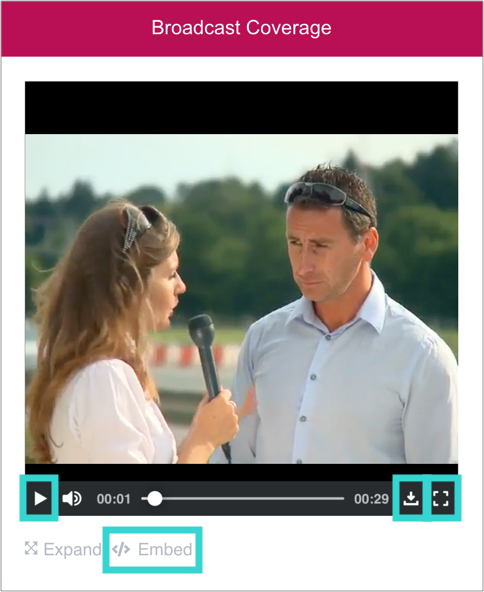
Releasd can host short video clips via the Video widget.
Although videos from YouTube, Vimeo or similar can be embedded, some users may wish to upload files from their computer. To ensure that the service runs smoothly for all customers, the maximum file size per video is 500MB.
To achieve this, some files may need to be trimmed or compressed. Luckily, that can be done easily and for no cost on both Windows and Mac.
Here, we cover the following:
1. Windows (via Photos)
a) Trimming
b) Compressing
2. Mac (via Quicktime)
a) Trimming
b) Compressing
1. Windows (via the Photos app)
a) Trimming Video with Windows 10 Photos
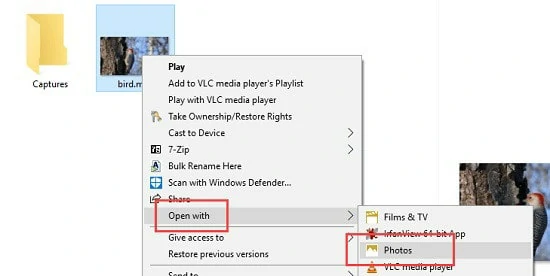
1. Locate Your Video Clip: First, locate the video clip you want to trim on your computer.
2. Right-click the Video: Right-click on the video file and select "Open with" > "Photos."
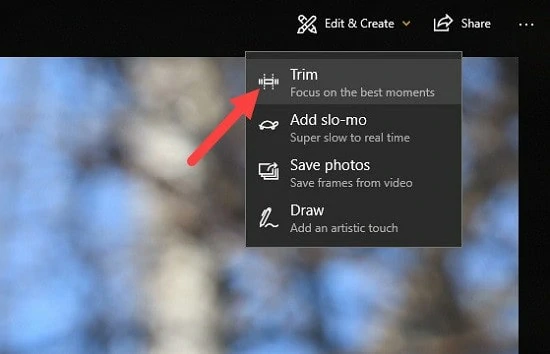
3. Open Video Editor: In the Photos app, click the "Edit & Create" button at the top-right corner, then select "Trim."
4. Trim Your Video: You'll see a timeline of your video at the bottom. Drag the handles on both sides of the timeline to select the portion you want to keep. You can also use the "Set start point" and "Set end point" buttons to fine-tune the selection.
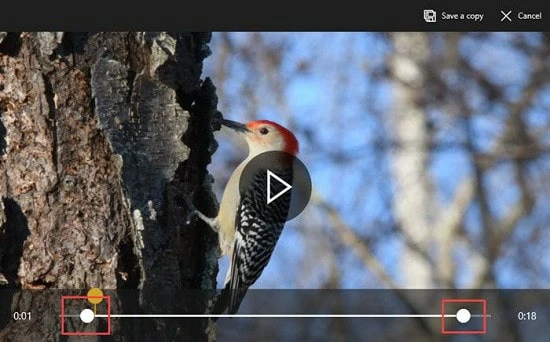
5. Save the Trimmed Video: Once you're satisfied with the trim, click the "Save a copy" button. Choose a location to save the trimmed video, set a name, and click "Save."
b) Compressing Video with Windows 10 Photos
1. Open Your Video: Open the Windows Photos app and locate the video you want to compress.
2. Click on the Video: Select the video to open it.
3. Click on the "Edit & Create" Button: It's located in the top-right corner of the window.
4. Choose "Create a video with text": This option will allow you to export the video with compression settings.
5. Select Output Settings:
Choose a name for your video.
Choose the quality level under "Video quality." Lower quality settings will result in a smaller file size.
Choose a resolution under "Video size." Reducing the resolution will also reduce the file size.
Choose the duration of each photo (if applicable).
Click "Create Video": After configuring your settings, click the "Create Video" button.
6. Choose a Save Location: Select a folder on your computer where you want to save the compressed video.
7. Start the Export: Click "Save" to begin the export process. The Photos app will compress the video according to the settings you specified.
2. Mac (via Quicktime)
a) Trimming Video with Quicktime
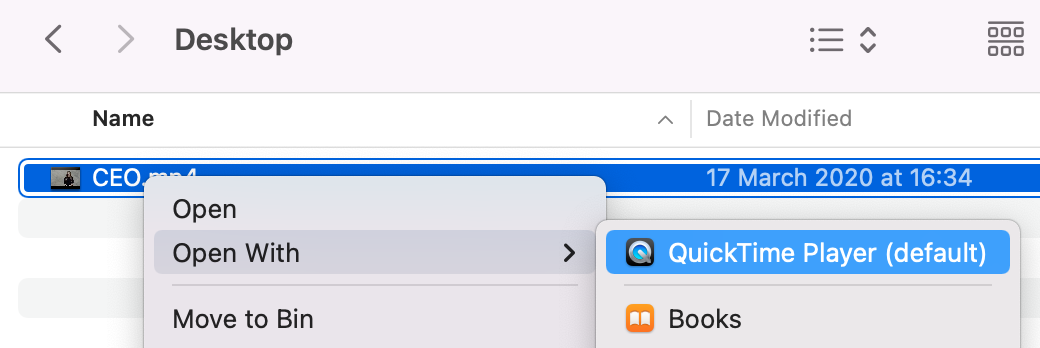
1. Locate Your Video: Navigate to the video file you want to trim using the Finder on your Mac.
2. Open With QuickTime Player: Right-click (or Control-click) on the video file and select "Open With" > "QuickTime Player."
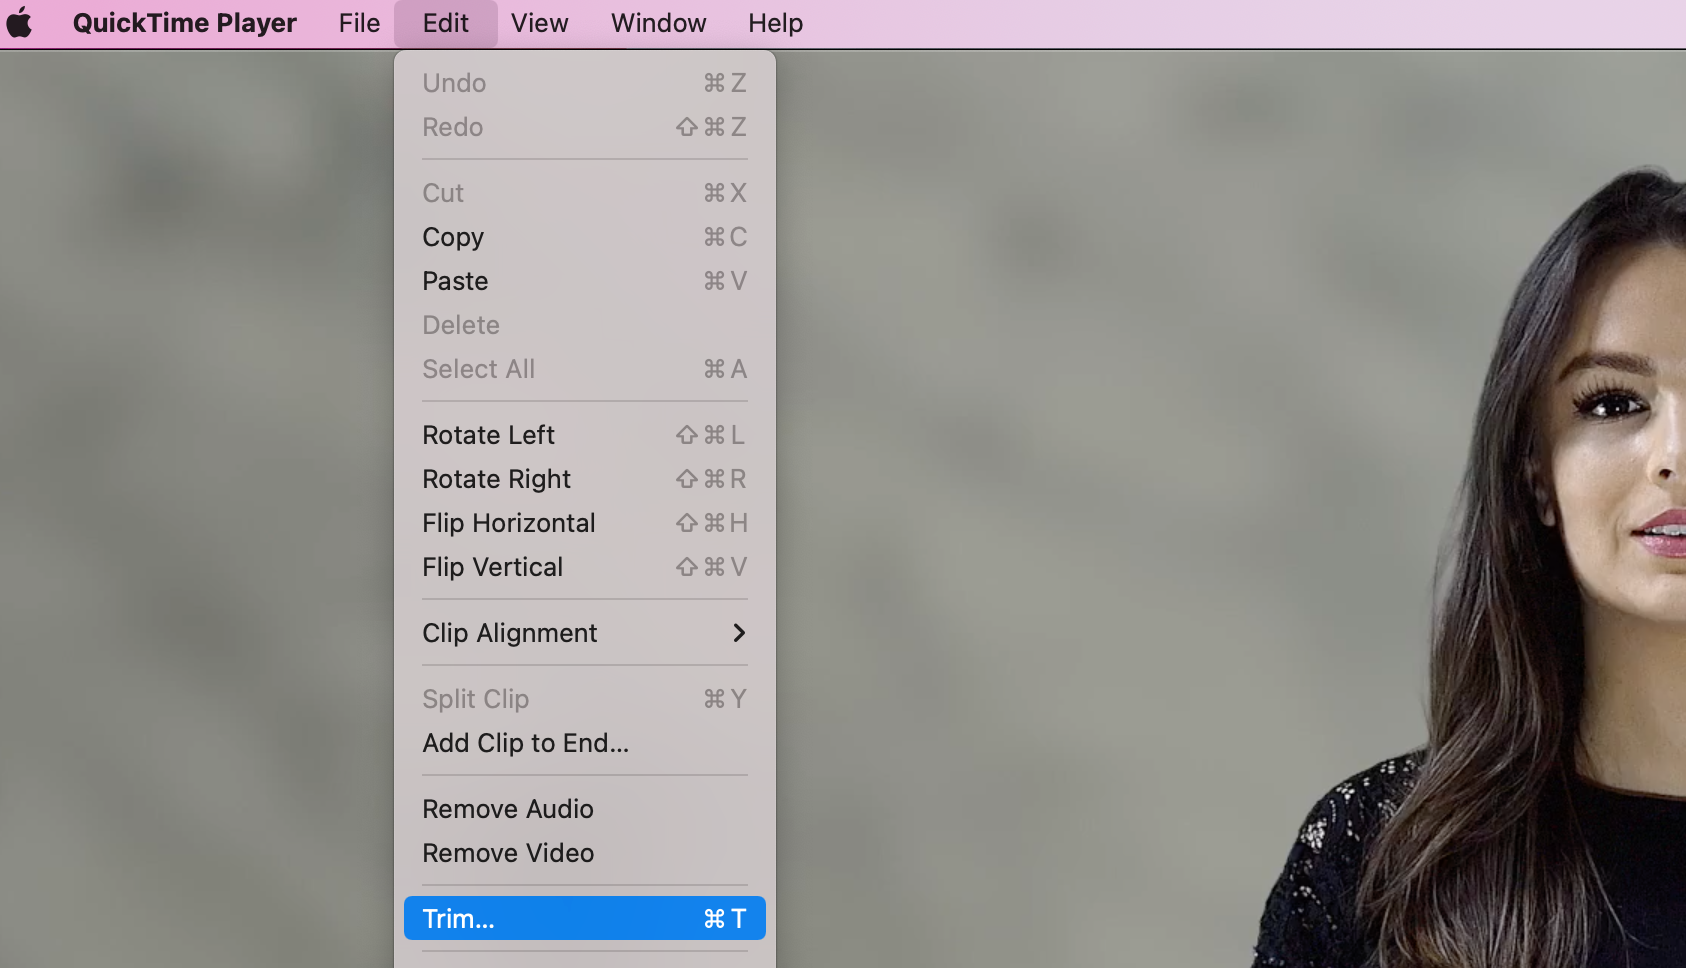
3. Access the Trim Feature: In QuickTime Player, click the "Edit" menu in the top menu bar.
4. Select Trim: Choose "Trim" from the dropdown menu.
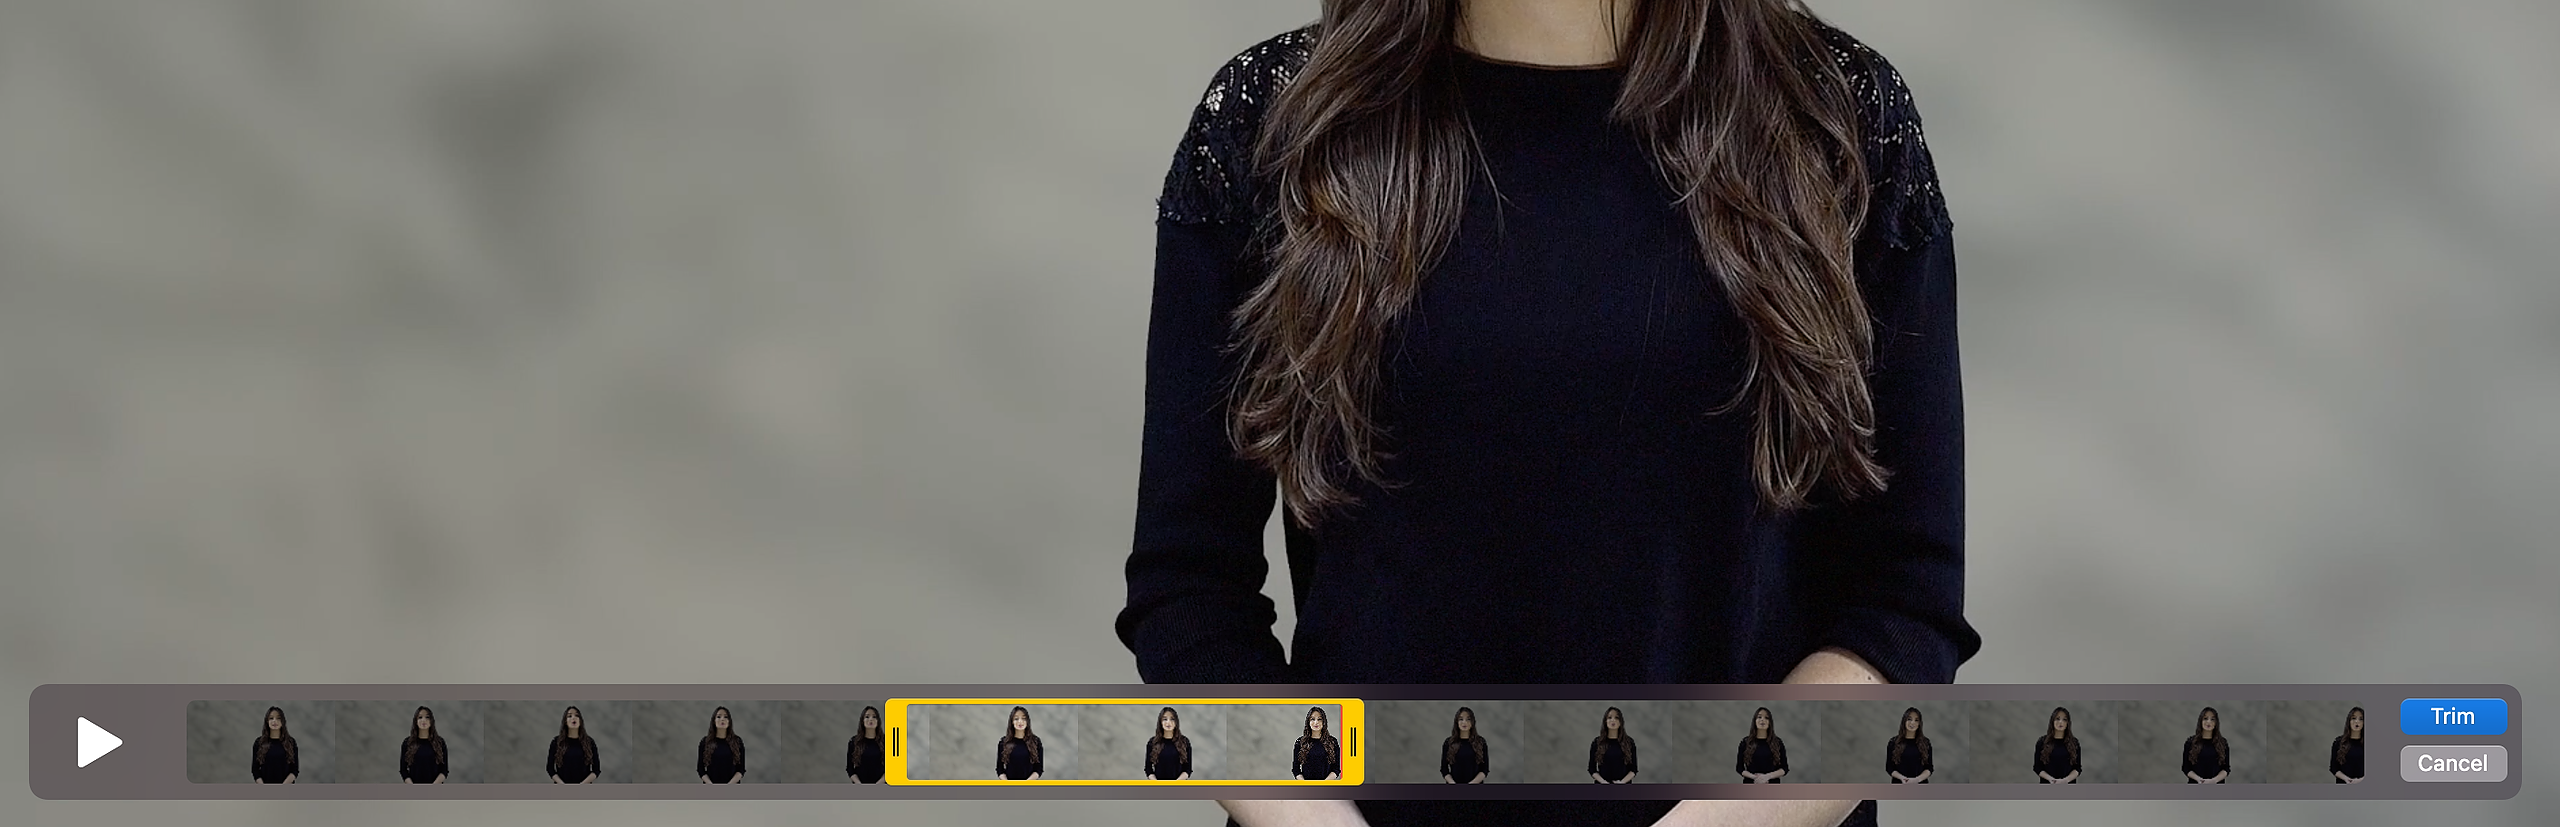
5. Use the Timeline: A timeline will appear at the bottom of the QuickTime Player window. This timeline is where you'll perform the trimming.
6. Set the Start Point: Move the playhead (a vertical line) to the point in the video where you want the trimming to begin. You can do this by clicking and dragging the playhead or by using the arrow keys on your keyboard.
7. Trim the Start: Click the "Trim" button at the bottom-right corner of the player to set the start point. This action will remove everything before the playhead position.
8. Set the End Point: Move the playhead to the point where you want the trimming to end.
9. Trim the End: Click the "Trim" button again to set the end point. This action will remove everything after the playhead position.
10. Save / Choose a Location: Select File > Export As. Select a location on your Mac where you want to save the trimmed video.

11. Name Your Video: Enter a name for the trimmed video.
12. Select Format and Quality: Choose a video format and quality option. For most purposes, "1080p" or "720p" should be sufficient.
13. Save Your Video: Click the "Save" button.
b) Compressing Video with Quicktime
1. Locate Your Video: Navigate to the video file you want to trim using the Finder on your Mac.
2. Open With QuickTime Player: Right-click (or Control-click) on the video file and select "Open With" > "QuickTime Player."

3. Export: Select File > Export As. Select a location on your Mac where you want to save the trimmed video.

4. Name Your Video: Enter a name for the trimmed video.
5. Select Format and Quality: Choose a video format and quality option. For most purposes, "1080p" or "720p" should be sufficient; but the lower the resolution, the smaller the file size.
6. Save Your Video: Click the "Save" button.